Showing posts with label Tim Holtz. Show all posts

Thursday, September 11, 2014

And More Bookmarks


More Christmas and Halloween bookmarks.


These on #8 manila tags, using  black rub-on's,
 Distress Stain and rubber stanps.


Finished off with colourful ribbon,


and ready to go at Art Girlz in Autumn, 
Sunday September 28 10-5 here in Morro Ba
at Altered by the Sea Studio.

Tuesday, September 9, 2014

Holiday Bookmarks


More bookmarks for the upcoming show - 
these done on black tags with white rub-ons.


Sort of a chalkboard effect - 
great contrast between the black and white.


For Halloween and Christmas and available at 
Art Girlz in Autumn at the end of the month.

Monday, August 4, 2014

Journal Fun


Here are some pages from my daily journal where I used some of the techniques I've been learning while working on the tags over the last few months.


It's been fun incorporating them onto pages.


And trying different combinations of stamps and colours.


Friday, July 25, 2014

Last of the Tags


Perfect Splatter Distress

 And here are the last of the tags from
Tim Holtz's Creative Chemistry  classes.


 Perfect Distress

I've been using many of the techniques in my daily journal,


 Perfect Distress Mist

and it's been a lot of fun to try them out
 on different paper and surfaces.

Rock Candy Distress Stickles

Thanks for "tagging along" through all these posts!

Wednesday, July 23, 2014

A Few More Tags, Part 2

 Crackle Paint Resist

This one has a great texture, love the way the stains
go into the cracks in the paint.

Shattered Stains Technique

Hard to see in the photo, but the chipboard crowns
actually came out looking like shattered glass.


You can get a better idea from this close-up.

Nostalgic Batik Technique

Another resist using embossing powder and  Distress inks.


Monday, July 21, 2014

A Few More Tags

Distress Embossing Powder Resist

Working my way through the last several 

Rusted Enamel Technique

With my sometimes now limited energy I've found 
tags the perfect small "canvas" to work on.

Distress Paint Resist Technique

And, I'll have all these cool technique under
 my belt to use on bigger projects in the future!

Monday, June 16, 2014

Final Tags - Part 2


I feel a sense of accomplishment that I finished 
making a set of 2 of each of the tags for Chem 102.


 I love many of the techniques I learned and it was 
lots of fun to try out products that were new to me.


The above two use a technique called "Chalkboard" - a black tag embossed with Antiquities Frosted Crystal Embossing Powder, then rub regular chalk over it and work it in with your fingers - Voila! - it really does look like a chalk board.


These two use regular embossing powder 
and ultra thick embossing powder on
 chipboard crowns to produce a pitted metal look. 


I've put them all on a BIG key chain


and pasted the technique details on the back - 
a handy reference to return to!

Saturday, June 14, 2014

Final Tags - Part 1


Finishing up the last four techniques in
Tim Holtz's Creative Chemistry 102.


 Above and below - "Rusted Distress"-
 using Distress Embossing Powder to give a
rusted metallic look to chipboard, cardstock, etc.


Also used the Distress powder with 
layering stencils on the tag backgrounds.


And these two use clear embossing powder
(on a black painted tag) that is then lightly painted over,
the paint is scrumbled off and leaves a "Shabby Chic" look.


Check in on Monday to see the last two sets of tags!

Thursday, May 22, 2014

Tag-Tastic!


Two more techniques using alcohol inks.


 These two tags, on glossy cardstock,
 were swiped through several colours of ink,
 including a gold metallic, and then stamped.


 I love the marbled effect and the way
the metallic shines through.


 These, again on glossy cardstock, used several
 colours of ink, dabbed on with a blending tool. 


Then laying down a stencil and using the tool with
 blending solution to fade out some of the ink.
Again I want to do more with alcohol ink
so I can perfect some of these techniques.


Tuesday, May 20, 2014

Tag-a-Lama-Ding-Dong


A couple more tag techniques.


The first, using alcohol inks to add colour to metal stampings,


 and adding patina.


The second, on glossy cardstock, using three related 
colours of alcohol ink -
 a bright, a light and an earth tone,


to create an ombre effect.  This is the first time I've worked with alcohol inks, I look forward to doing more and getting a better feel for what they can do.

Monday, May 12, 2014

Tag-o-Rama


A couple more techniques from
Tim Holtz's Creative Chemistry 102.


The first, called "Smudge", has you stamping on one tag and then without reinking, stamping on a second tag and then smudging the images with a blending tool.  The second tag has sort of a ghost image and looks delightfully worn and distressed.


And this one uses Distress Stains and a brayer to lay them down.


It gives an interesting background that
works well with the stamped images.


Monday, April 28, 2014

Last Few Tags (til next time!)


Two more tag techniques from Tim Holtz.  The first using a 
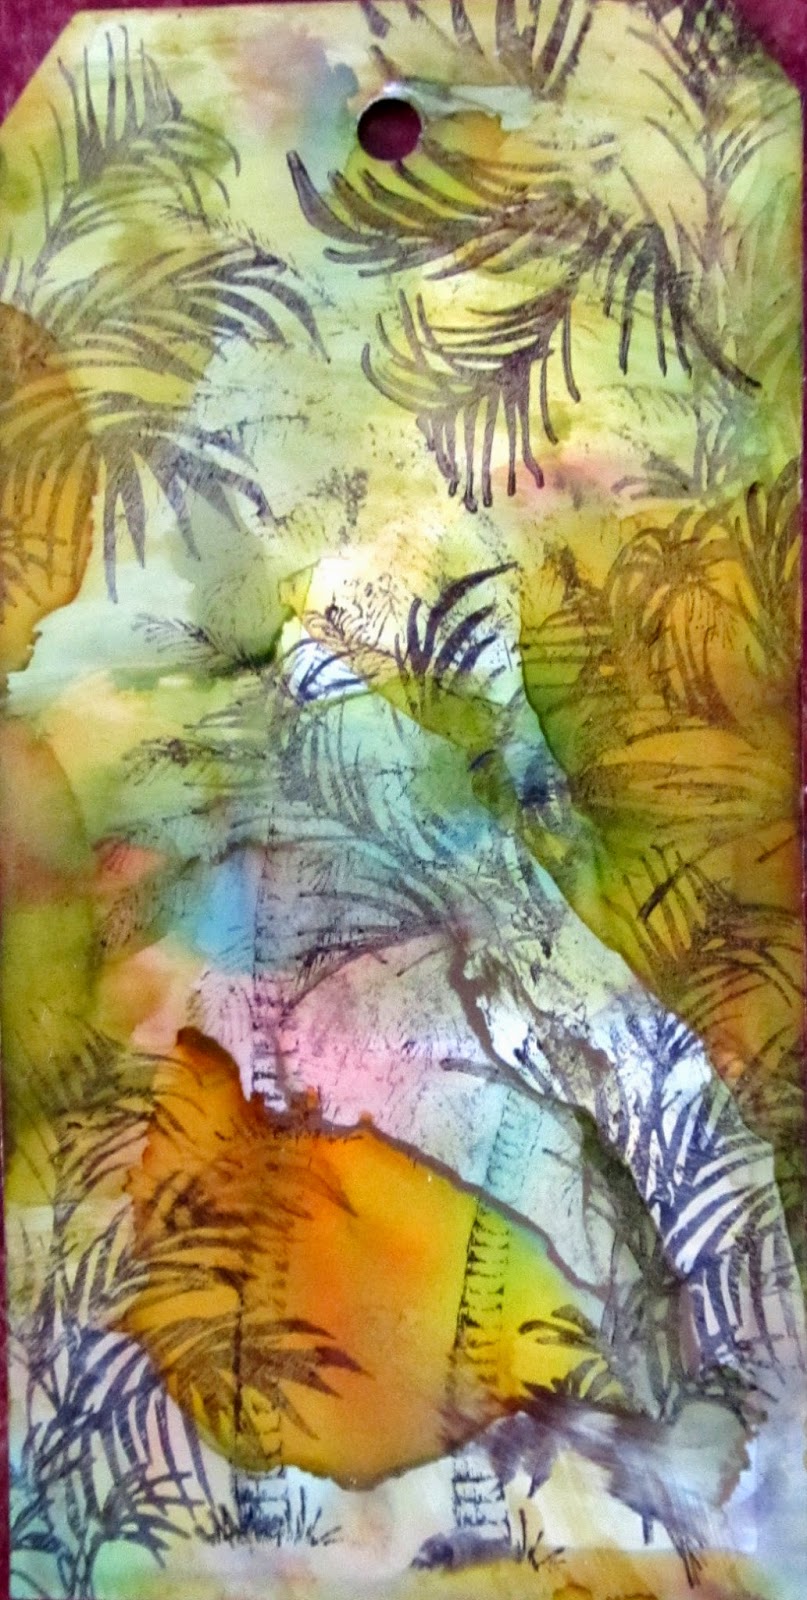
Distress Paint marbled background with plastic numbers from Idea-olgy that are dabbed with Distress paint then rubbed in places before dried with a heat tool.


I love the shabby look lifting off some of the paint gives, just be watchful with the heat tool, too much will melt the plastic.


The second technique calls for covering the tag in metal foil tape - aluminum in this case.  Then putting it into an embossing folder.  I used a rolling pin to do the embossing.  I have a machine that my daughter (the one who's a Michael's manager) got me for Christmas, but I'm embarrassed to say I haven't learned how to use yet!.  It sorta worked, but obviously better results would have been had with a machine.  The two patterns I tried are from ClutterBug - Fleur de Lis and Spots and Dots


Then you coat the foil tape with Distress Paint, I use Antiqued Bronze. Then you wipe away most of the paint.  The idea is that the paint will sink into the embossed parts and wipe off the surface.  It would have worked better if the embossing was deeper (which it would have been with a machine) but it still left an interesting surface. Guess my next project is to learn how to use that machine!!


I put all the tags I've done so far on a big key ring, where I can flip through them and study the techniques any time I want or need to.  It was fun working on these "mini-projects", I learned lots of new ways to use the paints and inks and it felt good to finish up so many.